Article sections
Most BrainFPV flight controllers feature a custom graphical OSD (gOSD) that offers nicer graphics and additional features when compared to traditional character bases OSD’s. Below are instructions on how to use the gOSD features. Most features are available in both Betaflight and INAV. Note that the gOSD only works with analog FPV systems, so you will not be able to use them with digital FPV systems such as the one offered by DJI. You can of course still use your BrainFPV flight controller with a digital FPV system, but you will get the same OSD features implemented in the digital system like with other flight controllers.
EXAMPLES
You have heard about the graphical features of our OSD. But what exactly are they, and how do I use them?
After you have configured everything you need to in the Betaflight configurator, you can add additional features in the BrainFPV OSD menu.
Accessing the BrainFPV OSD Menu
Navigating the OSD MENUs
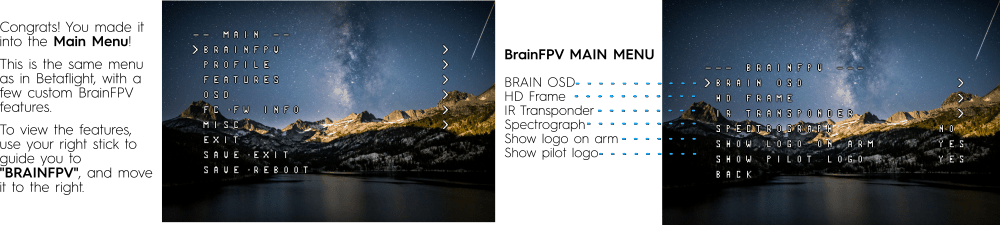
BrainFPV OSD Menu
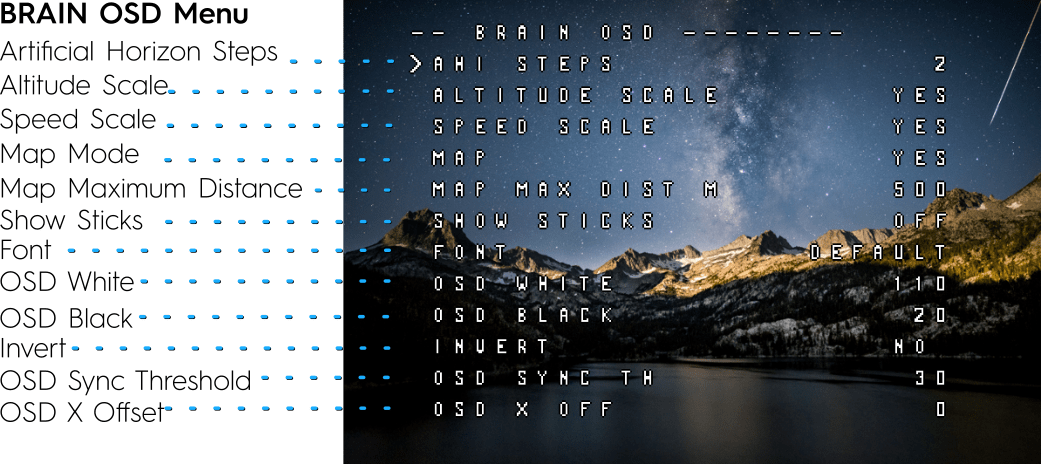
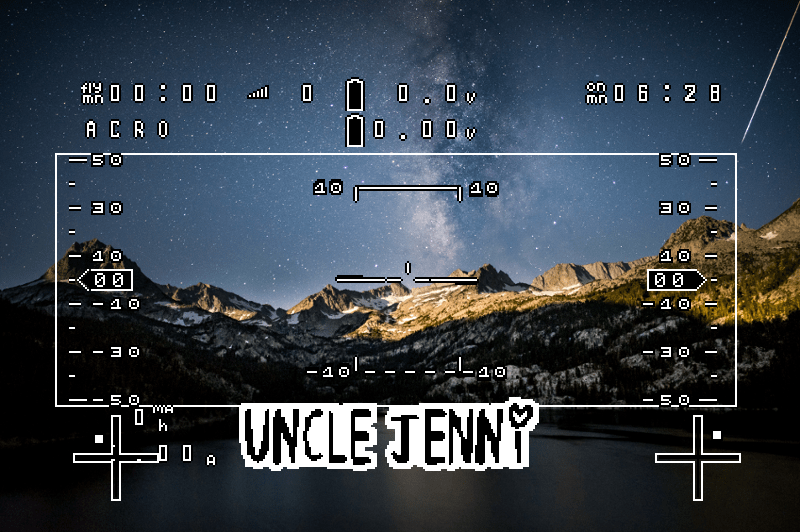
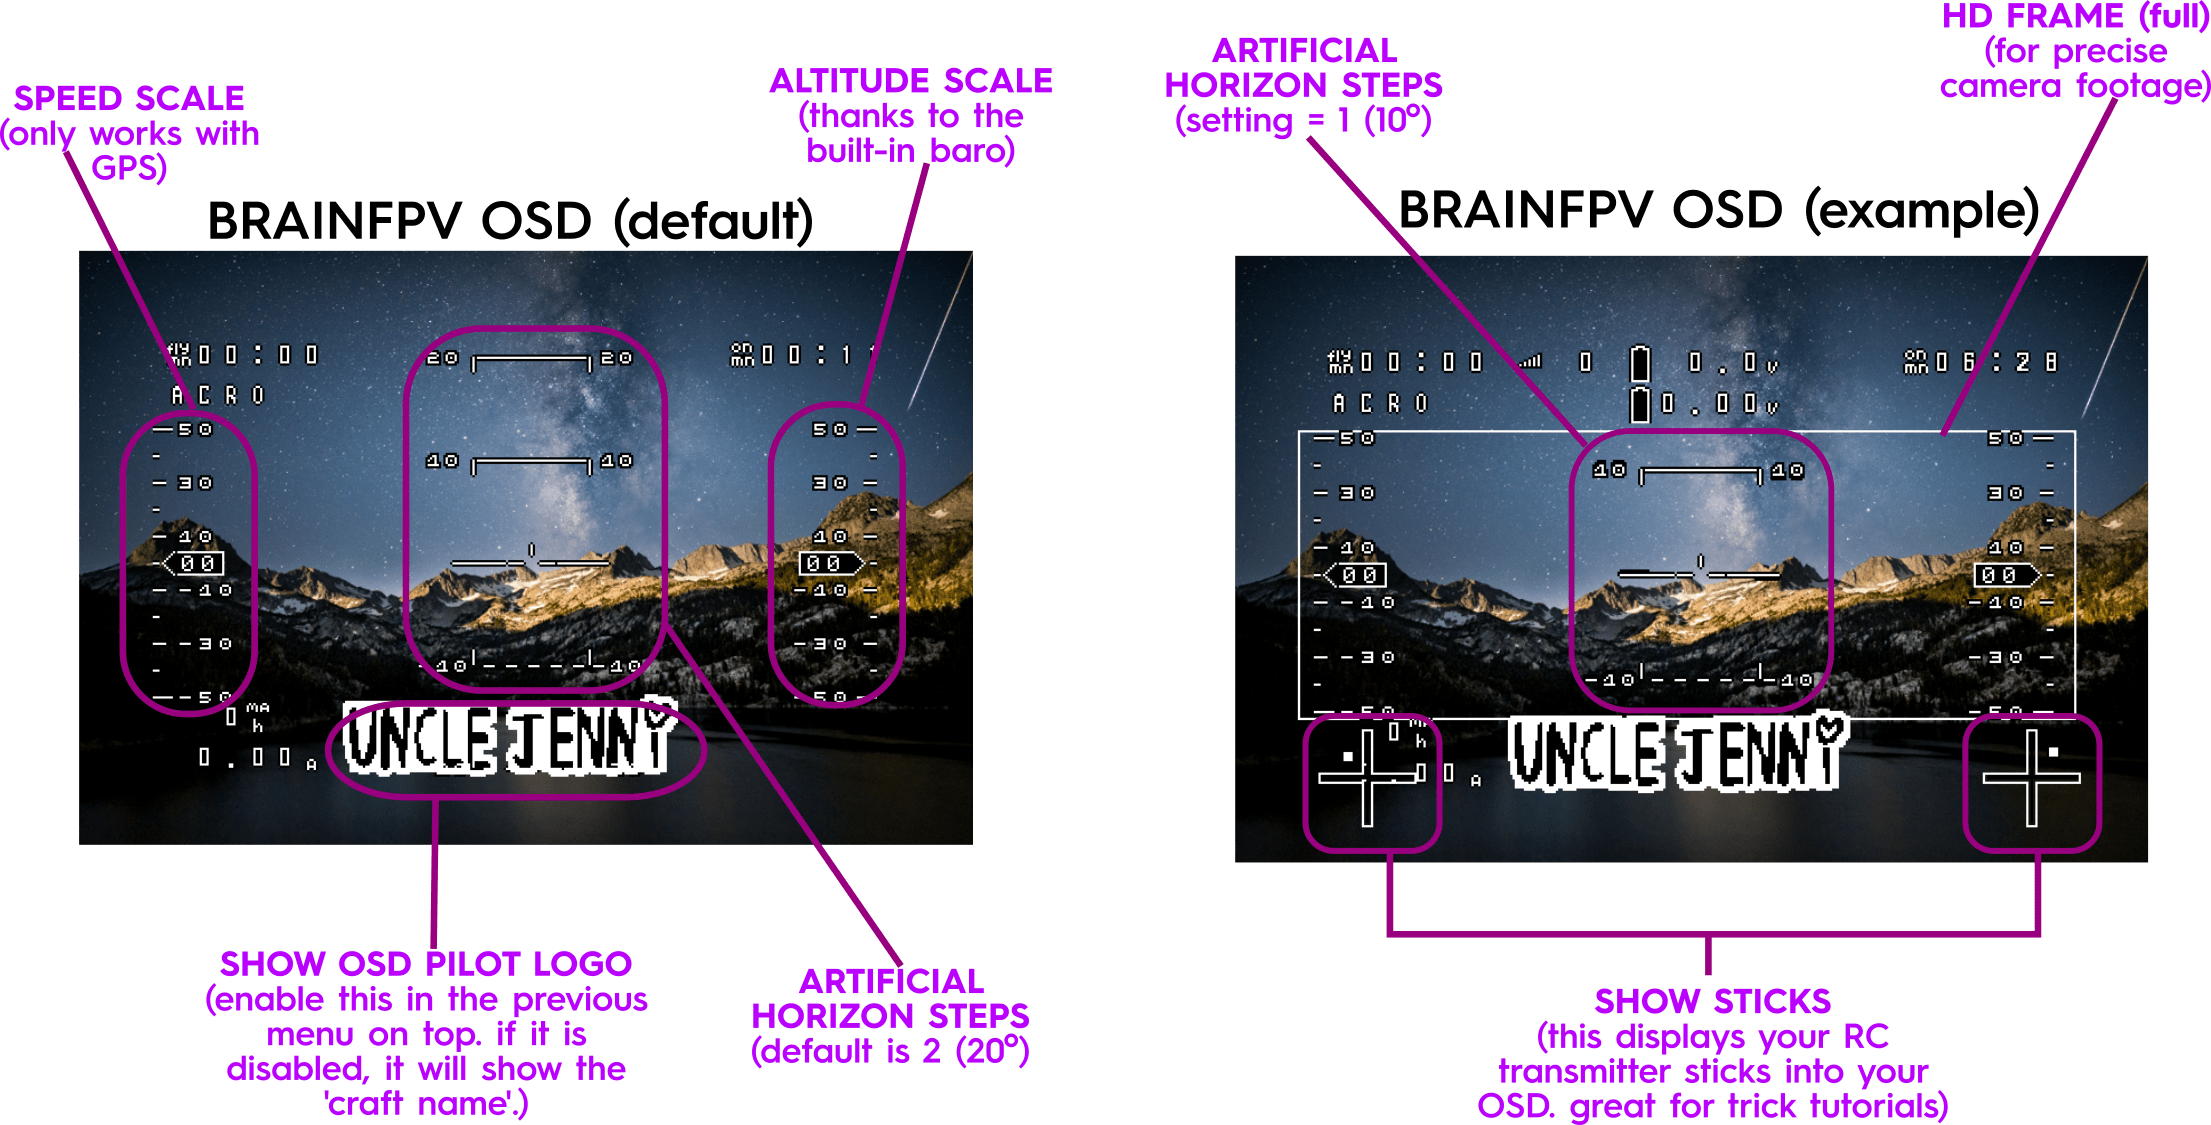
ARTIFICIAL HORIZON STEPS
- Number of steps in the artificial horizon – the little bar above and below in 10 degree steps
- Default 2, but you can change it min=1, max= 9.
- Enable in betaflight FIRST.
ALTITUDE SCALE (on the right side)
- Baro scale
SPEED SCALE- if you have GPS
- Similar scale on the left side shows speed.
MAP – GPS
- Little H shows you where ‘HOME’ is
MAP MAX DISTANCE M
- Maximum distance of the map
- If you are farther away than 500 meters, the little ‘H’ wouldnt move on the screen
- You can change it to 2000 if you fly far and fast all the time
SHOW STICKS
- Stick display to show sticks
- You can change to mode1 or 2 for different transmitters and preferences
FONT
- You can apply different fonts
- Only applied when you leave the menu
- 3 different fonts and Different sizes
OSD WHITE
OSD BLACK
- You can change the white and black levels
INVERT
- Invert colors
OSD SYNC THRESHOLD
- Adjust if your OSD flickers
- Default is 30
The best procedure for determining the correct threshold is as follows: Hold your camera towards a bright lamp and cover / uncover it with your finger while lowering the vale. Once the OSD goes away/starts flickering, write down the value. Then do the same but increase the value until the OSD goes away or starts flickering. Then set the value halfway between the minimum and maximum value and save it. So e.g. minimum: 15 maximum: 25 threshold to use: (15 + 25) / 2 = 20.
OSD X OFFSET
- Shift the OSD left/right
OSD X SCALE
- Scale it
3D mode
- Shows OSD twice for 3D mode
- Side by side 3d goggles
3D Right SHIFT
- To shift the right eye
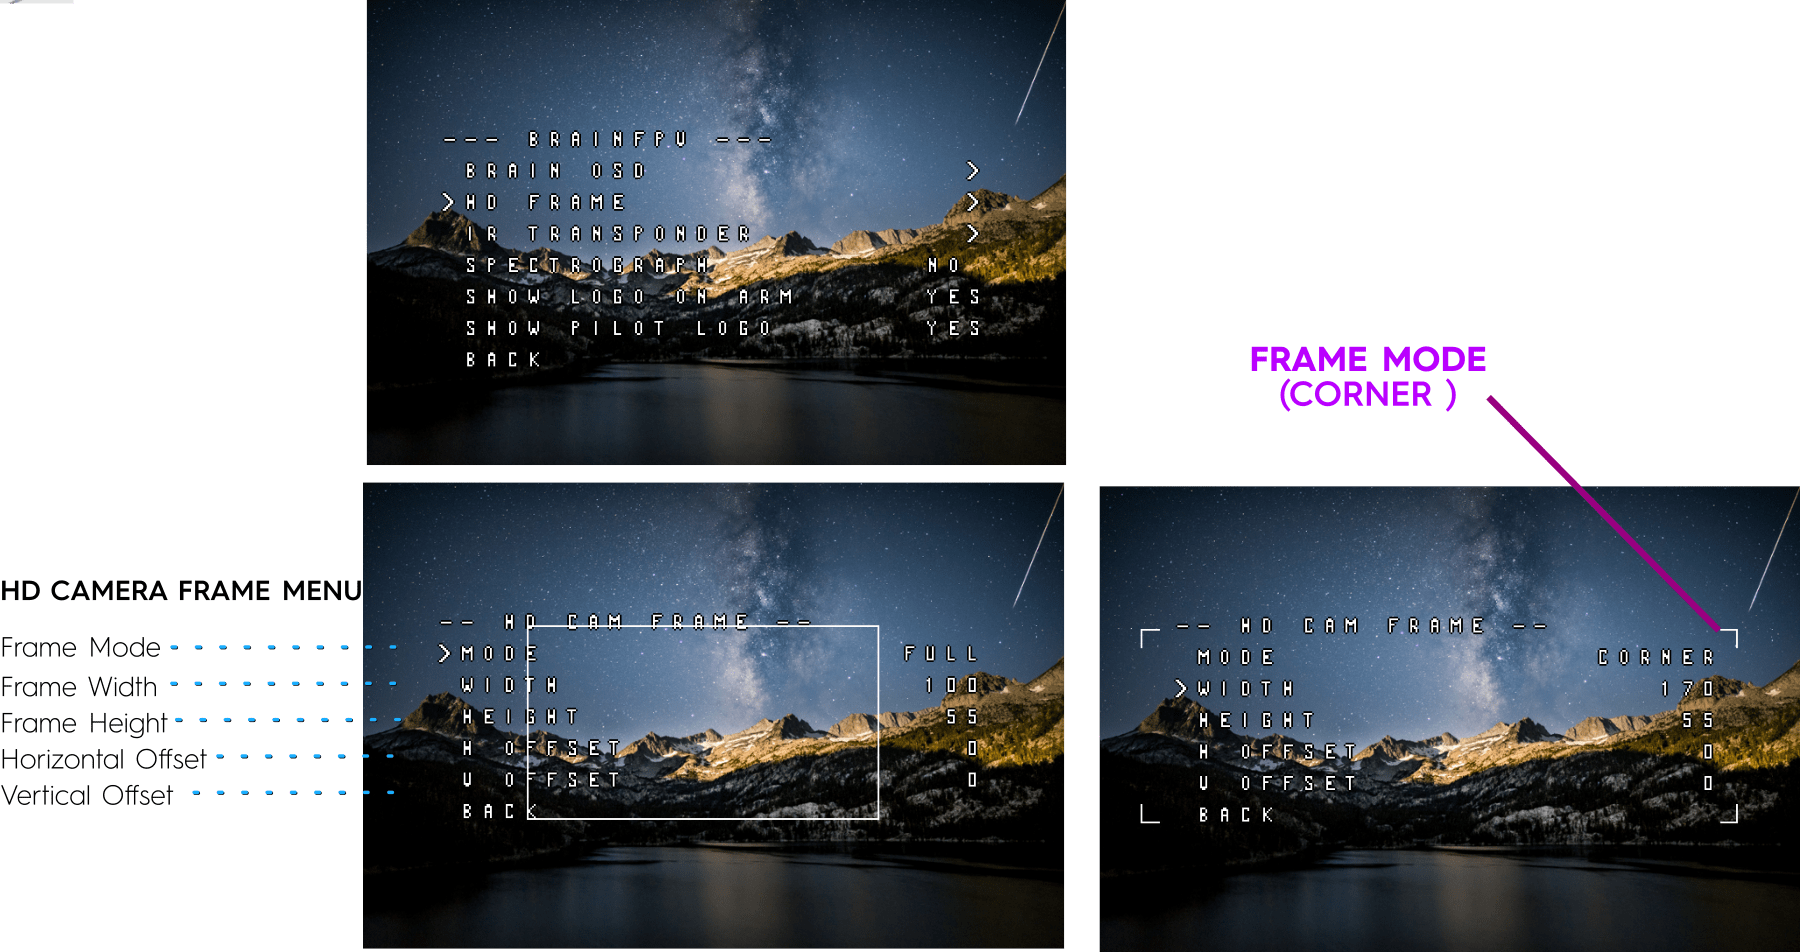
HD CAMERA FRAME
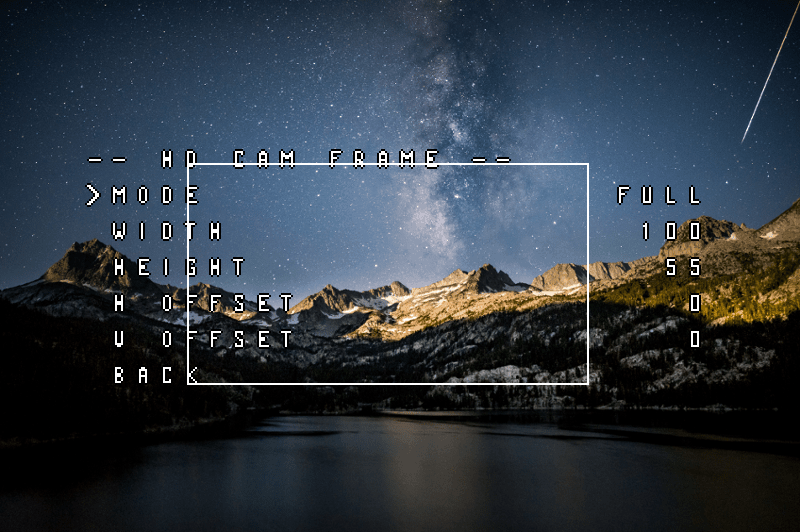
Gab707 suggested this feature. It is a white box or corners in your display where you can change the size and position to mimic what your GoPro captures. You can change the frame until you match what the gopro sees. This helps you get better footage!
- MODE
- Full
- Corners
- WIDTH
- HEIGHT
- HORIZONTAL OFFSET
- VERTICAL OFFSET
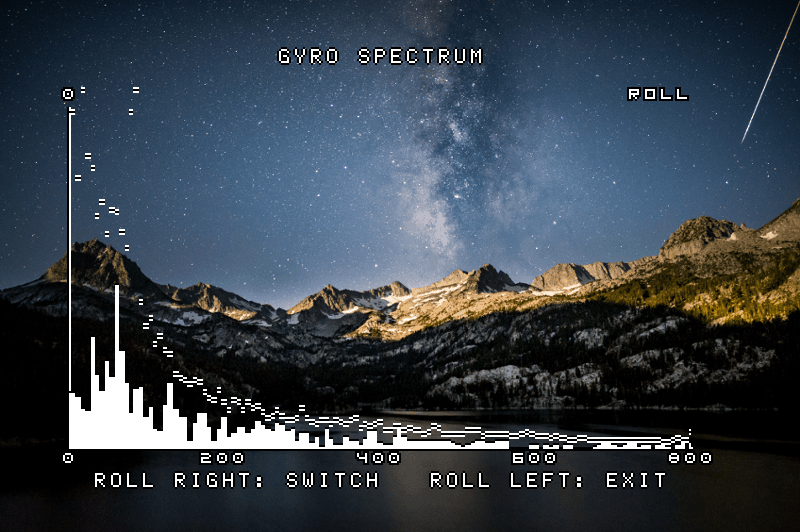
SPECTROGRAPH
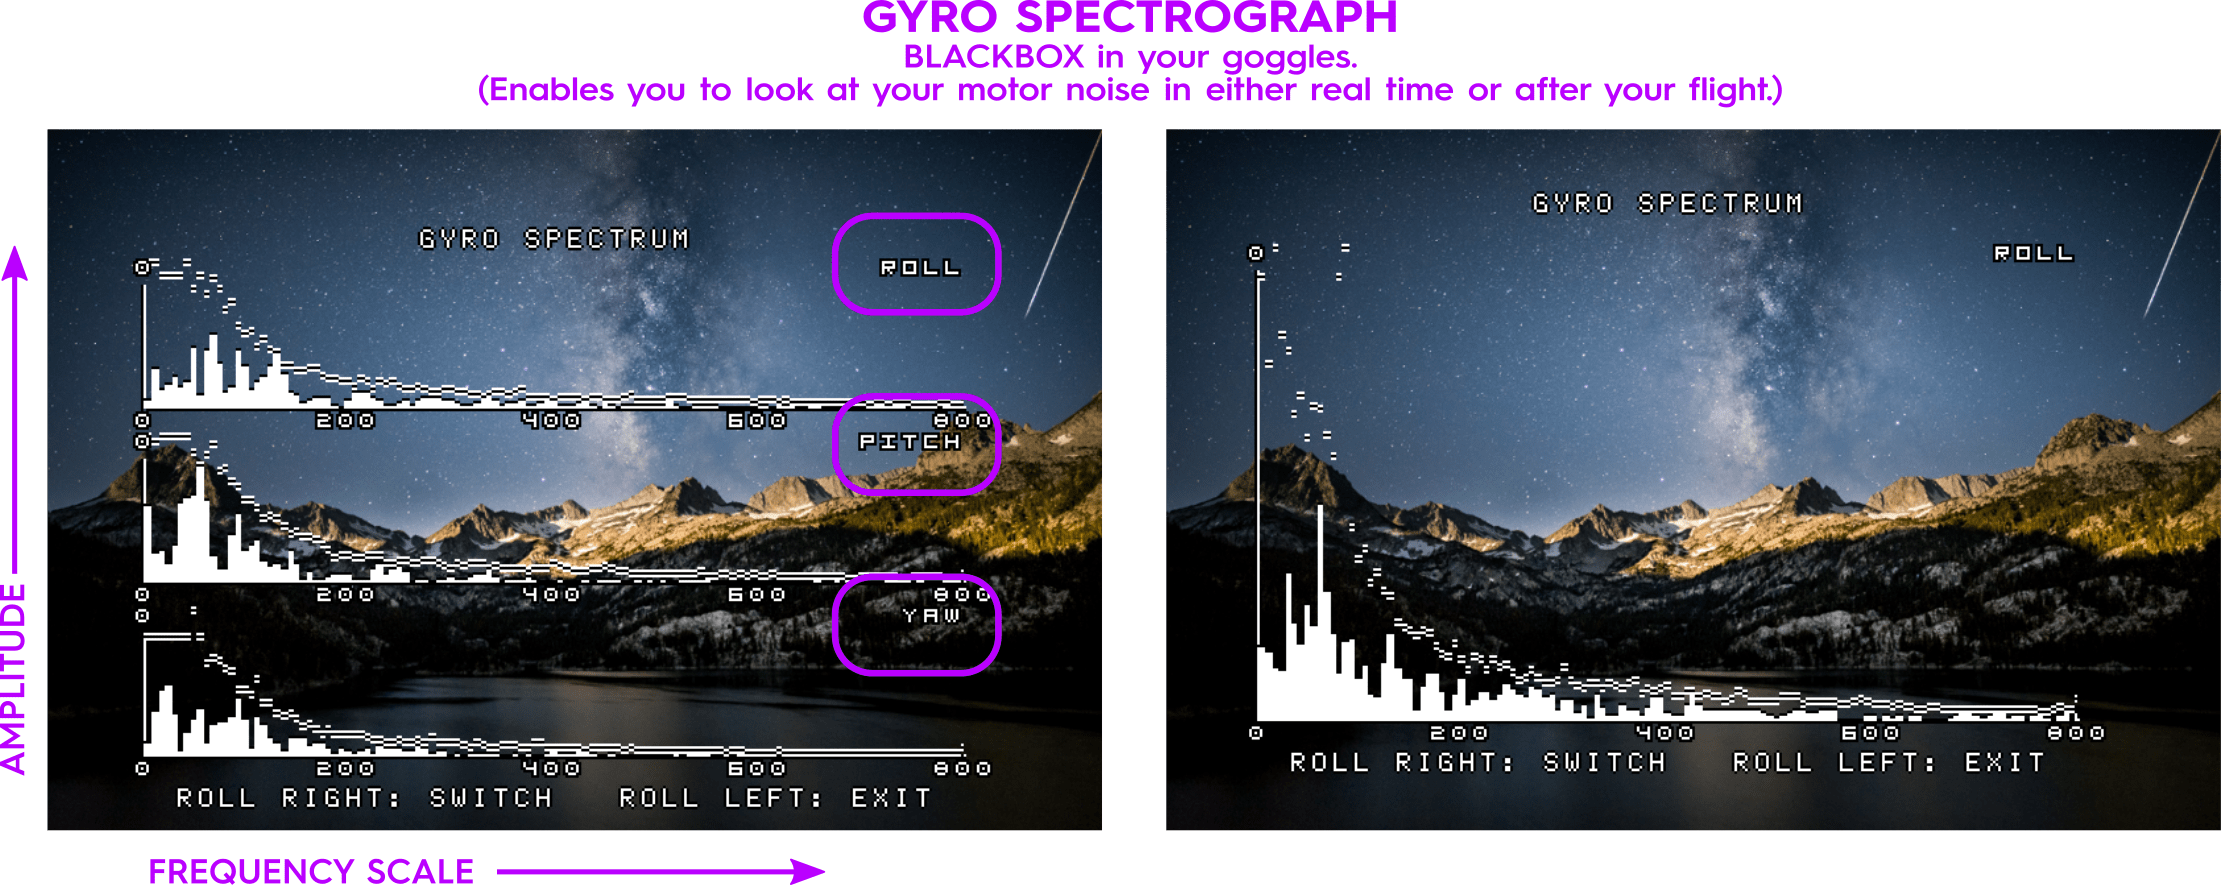
- The gyro SPECTROGRAPH is a cool feature that shows the frequency spectrum of your motor/gyro noise (x = frequency scale, y = amplitude). You can display it through your goggles in real time OR visualizes the data after your flight.
- Enable the spectrograph by turning it on/off in this menu
- Save/Reboot
- To use the spectrograph, you have to use your sticks like getting into the BrainFPV OSD menu, except instead of YAW LEFT, it is YAW RIGHT
- Use left stick to scroll through (roll pitch and yaw separately, or see them all together)
- BrainFPV Team Pilot, NobodyFPV made this great tutorial on how to tune your quad with it: